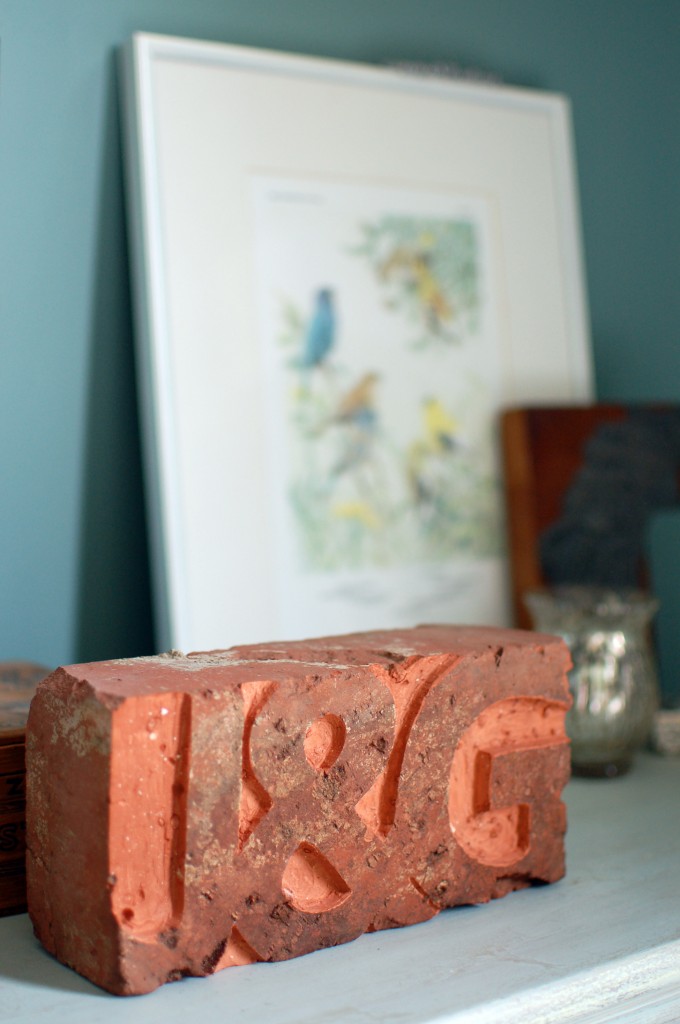
There’s something about the weathered texture and classic muted red that I love in salvaged brick. Growing up, we always had plenty of it around due to the stockpile my dad accumulated from the neighborhood chimneys toppled by the Northridge earthquake. This Valentine’s Day I stole a brick from the remnants of that stockpile to fashion into a gift for Jennifer. Knowing that she loves typographic details, I decided to carve our initials into one face of the brick.

One of the perks of being married to a graphic designer is getting to play with professional design software. Another is access to an unlimited number of fonts. For transferring type to the brick I created an Illustrator document with its dimensions, 4″ x 8″. I then set about selecting a font. I thought a modern, sans-serif typeface would contrast nicely with the worn brick. After trying all the sans-serif typefaces I could think of and a bunch more I hadn’t heard of, I settled on Frutiger. In addition to being an all-around nice looking font, its “J”, “G” and “&” have no descenders and fit into the rectangular shape of a brick. (I was surprised to learn that capital “J” is a descender in so many fonts.) I wanted the letters to fill the space of the brick, so I picked a heavy weight (65 bold) and eliminated the space between the characters. Once I had the text finalized in Illustrator, I printed it, cut it out and traced it on the brick.
To carve out the white space surrounding the letters I used my Dremel, beginning with relatively large grinding bits to clear out the larger spaces and then using finer bits for the detail work. For the finishing touches I used a fine-pointed tungsten carbide bit.

For the price of covering myself in fine red powder I had a unique Valentine’s Day gift that now adorns our distressed cabinet. Who knew you could turn a brick into something so cool?

you’re right that is cool! what a great idea!
I’m only about four months late with this comment, but this is absolutely brilliant. I appreciate that all of the projects you do with your initials would conveniently work for me as well! (So if ever you need to clear stuff out…)
Thanks, Joe. I’ll keep that in mind!
Pingback: Material Love: Brick | The Writing on the Wall
This is a great idea! Do you think that these bricks could still be used to make walkways and such? I think it would be a great way to personalize the back yard or the path to the front door.
Hi Brittney! Yes, I think you could use bricks similarly carved in a path or walkway. If you had a intricate pattern I would be worried about pieces breaking off over time, but for something like this I think it would be fine. The only other concern is that the carving might get a little more subtle if the brick got dirty (as it would in a path). Part of what makes the pattern stand out is the redness of the revealed brick, which would contrast less with the worn surface if it were dirty.
What Dremel accessory/carving bit did you use for the brick cuts? you have some very clean lines/edges there.
I have the same question as Shawn. What carving bit did you use?
Hi Shawn and Samantha! I used a several bits. For most of the carving I started with a pointed aluminum oxide grinding bit. Then I moved to larger, flatter bits like this and this to smooth out the carving. For the most intricate parts I used a tungsten carbide tip.
My husband and I are actually working on a brick project ourselves. He is having issues with his bits. We feel your answer to a previous question regarding your type of bits you used was helpful. However, your links to “this” and “this” brought me back to your blog. We are curious what two bits they are suppose to show. Thanks in advance.
Hi Amber, I apologize for the broken links. They should work now and link you to the appropriate Dremel bits.