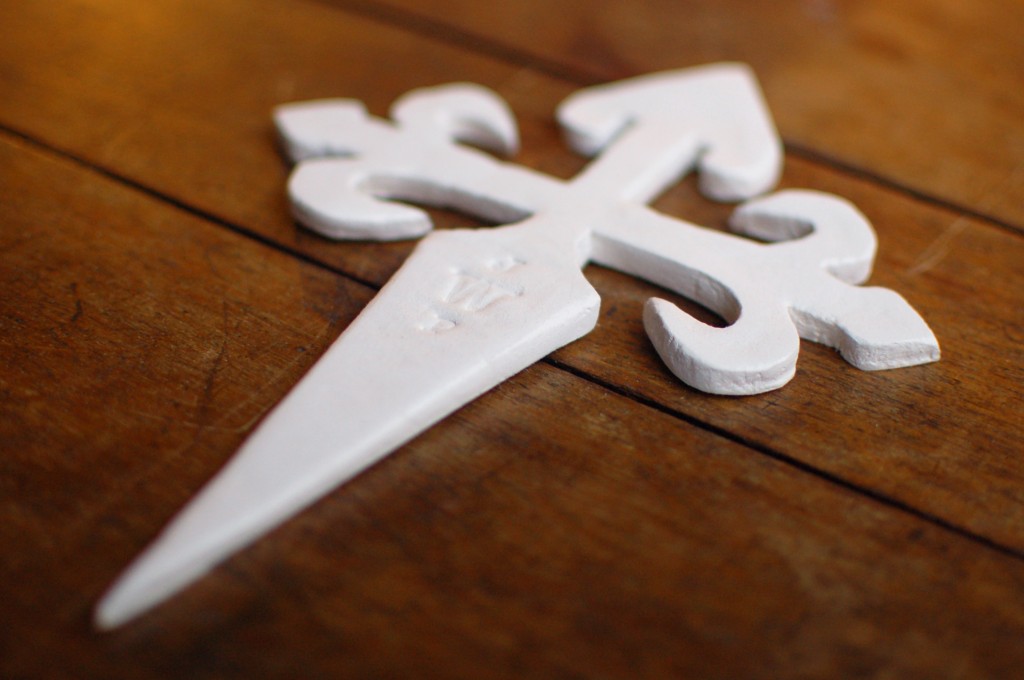
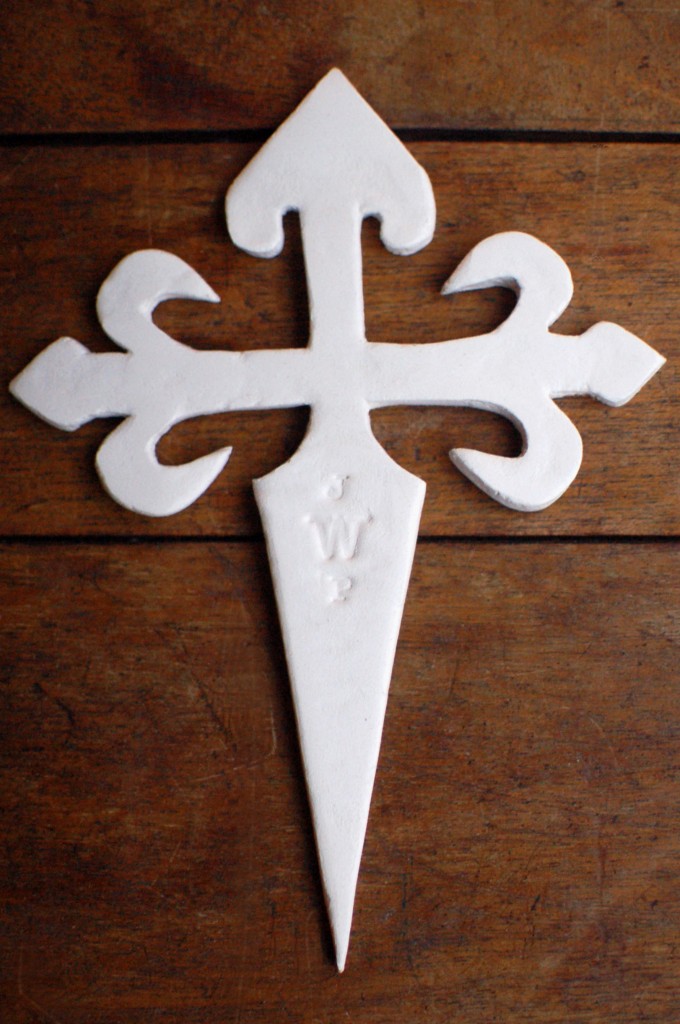
Greg and I made this cross as a baptism gift for our nephew James (since he couldn’t partake in the cross cookies). This is the Santiago cross, or cross of St. James. I love the interesting shape, but it was certainly my most difficult clay project to date!
I love Das air-dry clay, though I often forget to consider it for projects! I have made ornaments, gift tags and small dishes with the clay. While Das doesn’t feel like porcelain, without a personal kiln, I find it to be a great substitute. It dries white and firm (not plastic-y), and can be sanded (thank goodness) and painted (though I never have) after drying. It’s significantly lighter than a traditional clay piece, which can be nice for some applications, but also feels less elegant. Das takes 1-3 days to dry, and waiting for a fragile gift to hurry-up-and-dry-already can be stressful, so I’d recommend leaving yourself plenty of time.

Materials:
Das air-dry clay
Rolling pin
Large flat surface, like a wooden cutting board or a solid-surface counter-top
Wax paper
Tape
Xacto knife
Printed cross template
Small dish of water
220 grit sandpaper
Directions:
1. Tear off a sheet of wax paper, and tape it to your counter or cutting board.
2. Pull off a chunk of clay. If you package is open or the clay seems dry for whatever reason, sprinkle water, a few drops at a time. It’s like bread dough — a little water can change it dramatically, so go easy.
3. Roll the clay out large enough for your cross and about 1/4 inch thick. The thicker it is, the slower it will dry.
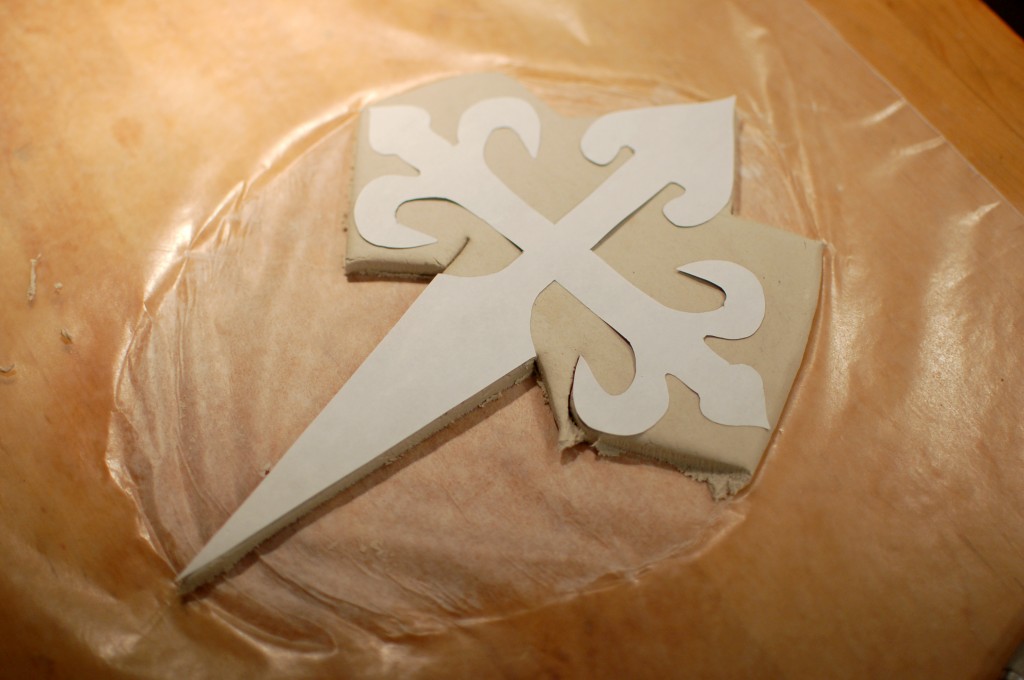
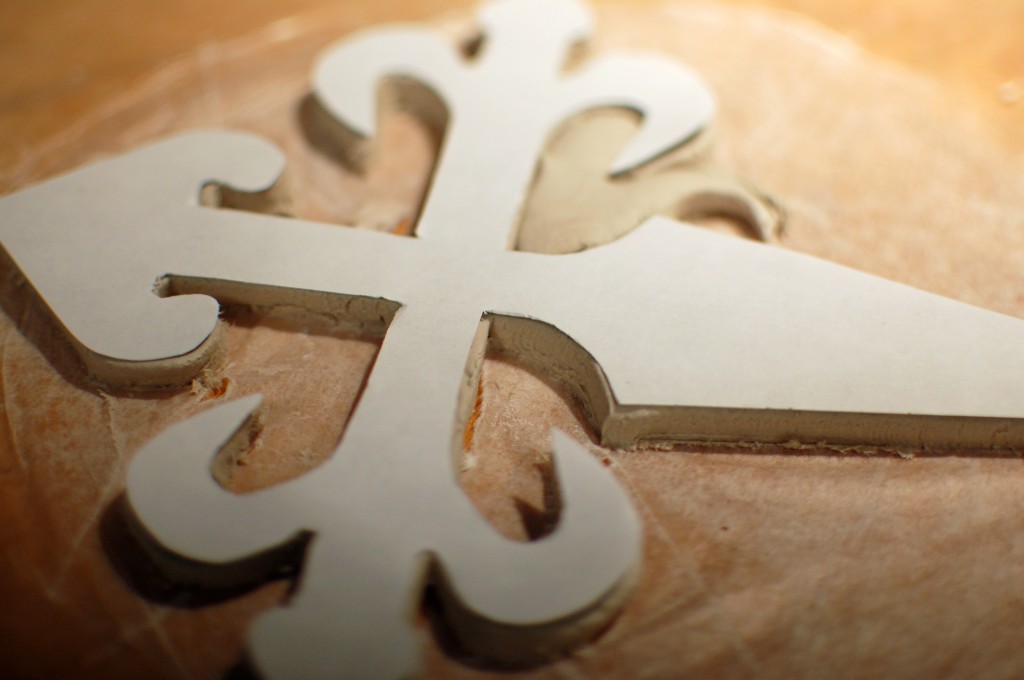
4. Set your template on top of the clay and press lightly so it sticks.
5. Use an Xacto to cut around the edges of your shape. I found it helpful to have the Xacto almost completely upright, making little saw-like strokes, rather than slicing at the typical 45-degree angle.
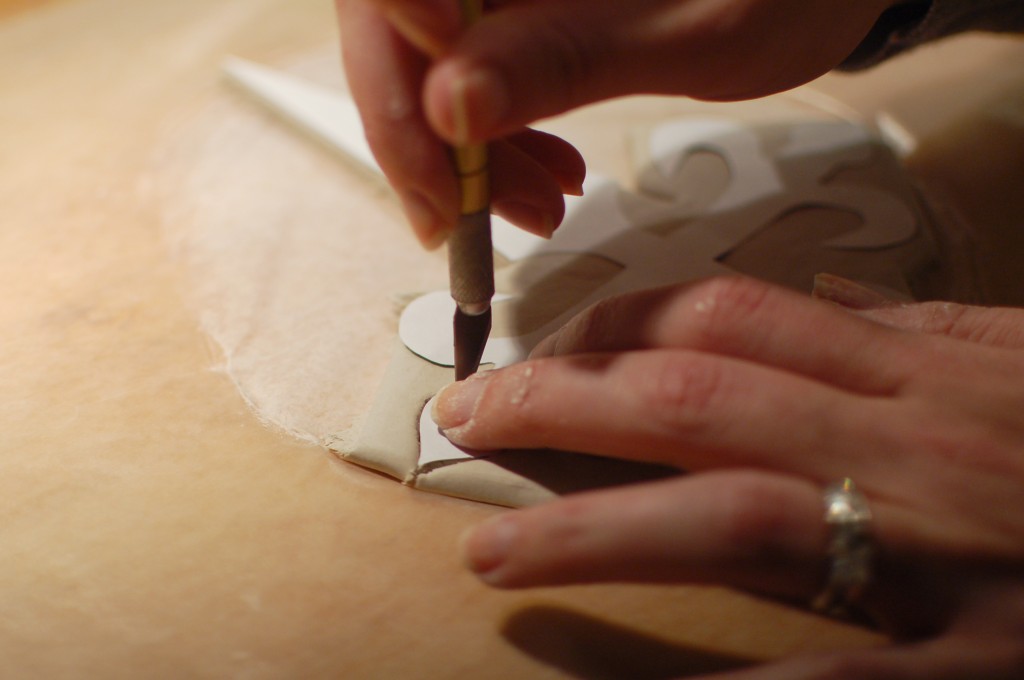
6. After cutting the shape out completely, you can lift the template and stamp a monogram, phrase or pattern onto the surface. The impression won’t show up if the clay is too wet. Let it dry a few minutes, if that’s the case.
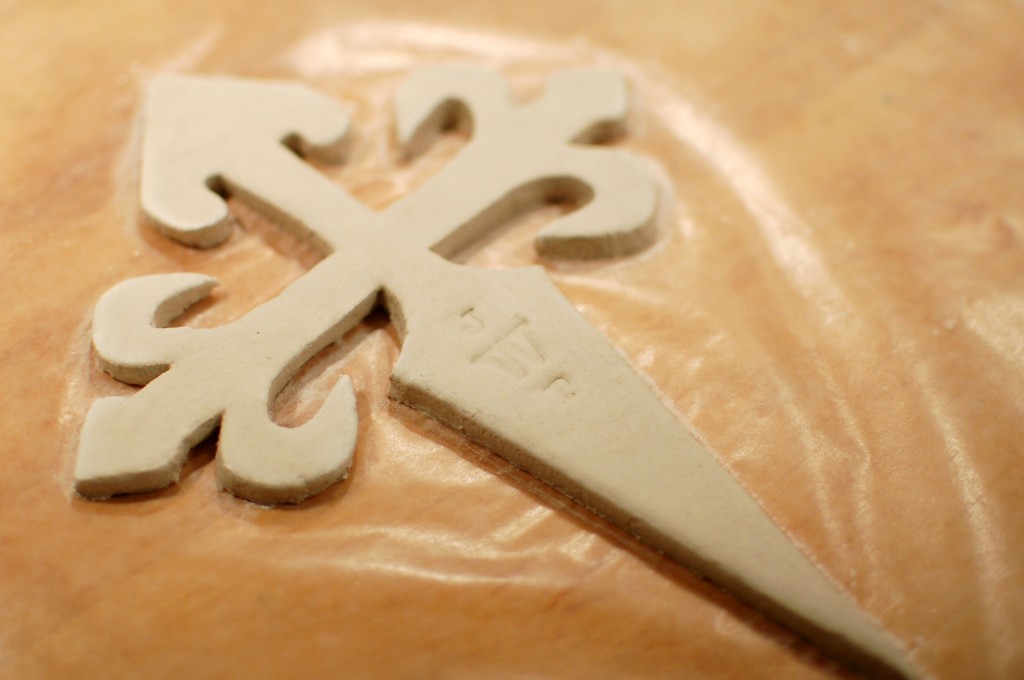
7. Use a few drops of water to smooth imperfections, like fingerprints and rough edges. It doesn’t have to be perfect, as you can sand it later.
8. Gently move your cross to a clean sheet of wax paper (I found that my wax paper was pretty damp. If yours isn’t, or you have plenty of drying time, you could leave it in place). A thin spatula can help move it.
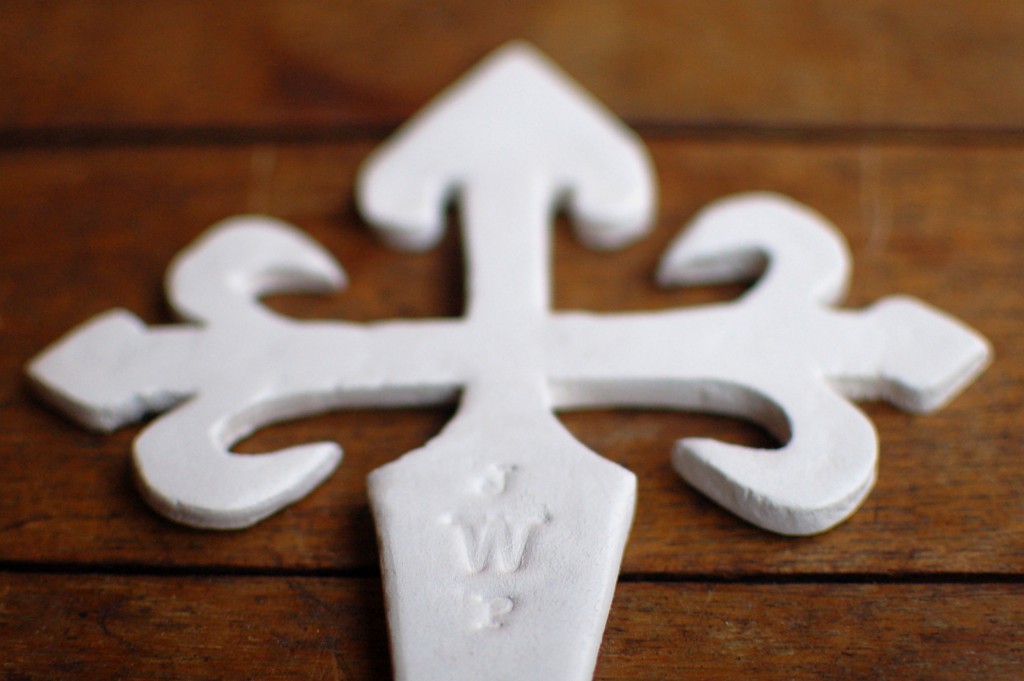
9. Let clay dry completely. It looks grayish at first, but will brighten to white as it dries. Eventually, I usually flip the piece over to expose the back to the air, but you risk making faint impressions on the front if it isn’t completely dry and/or resting on a very smooth surface.
10. Use a fan, but only if necessary. Drying too quickly will cause the clay to crack, so resist the temptation to put the cross in the oven if you’re running out of time. We foolishly made this cross on Friday night (excuse the dark photos!) before a Sunday morning baptism, so we used a fan and space heater on it for several hours on Saturday. It was dry enough to sand by Saturday evening and wrap on Sunday morning.
11. Sand the edges of the cross to your desired smoothness. Wipe off the dust, and pat yourself on the back!
You are one AMAZING auntie! This was such a thoughtful, one of a kind gift.